
A project has many layouts. A component uses the layouts for its own valid faces: cards and boards may have a front and back, screens have outside and inside, dice have numbered faces, and a box has one outside dieline. This tutorial is about how those face-specific sets are organised and how an item ends up with the design it gets.
The layout list
Open the layout and face selector in the Design editor header.
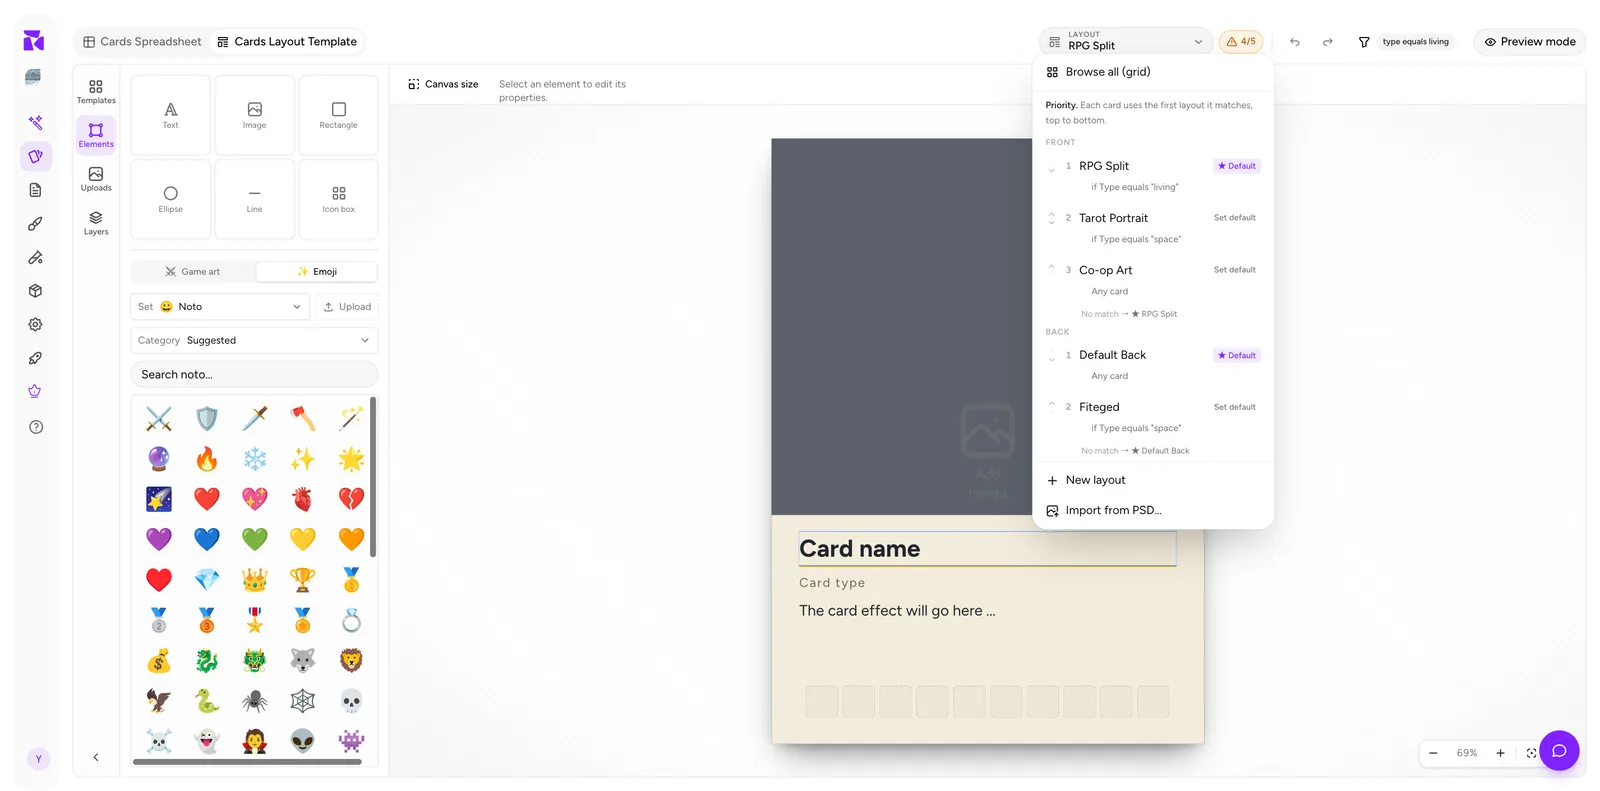
Everything about ShuffleKit's layout model is visible in this one panel:
Independent face groups. Each valid face resolves separately. A card can match layout 2 on the front and layout 1 on the back; the two decisions don't interact. A die's Face 1 does not compete with Face 2, and a box only has its Outside group.
Numbered priority. Each layout has a position. The note at the top states the rule:
Priority. Each item uses the first layout it matches, top to bottom.
A condition per layout. Shown under each name: if Type equals "living", or Any card for an unconditional one.
One starred default per group. ★ Default on the layout that catches everything unmatched; Set default on the others, to promote them.
The fallback line. No match → ★ RPG Split spells out where an item goes when nothing claims it.
Reading a resolution
Take the FRONT group from the screenshot:
| # | Layout | Condition |
|---|---|---|
| 1 | RPG Split | if Type equals "living" |
| 2 | Tarot Portrait | if Type equals "space" |
| 3 | Co-op Art | Any card |
- A card with
Type = livingmatches #1 and stops. - A card with
Type = spacefails #1, matches #2. - A card with
Type = artifactfails both, falls to #3. - A card with no Type at all also falls to #3.
Because RPG Split is also the starred default, a card that somehow reached the bottom without matching #3 would come back to it. However, #3 has no condition, so nothing ever gets that far.
Reordering
Click the small up/down arrows beside each layout's number. The menu stays open, so you can shuffle the whole list in one pass. Order is logic, not cosmetics.
The classic mistake: a broad rule sitting above a narrow one. If layout 1 is Type is not empty and layout 2 is Type equals legendary, layout 2 never fires because every legendary card already matched layout 1. Specific first, general last.
Creating, renaming and deleting
Three routes to a new layout, all from the same dropdown:
- New layout: a blank canvas.
- Import from PSD…: bring in a Photoshop design. (The Cards page also offers
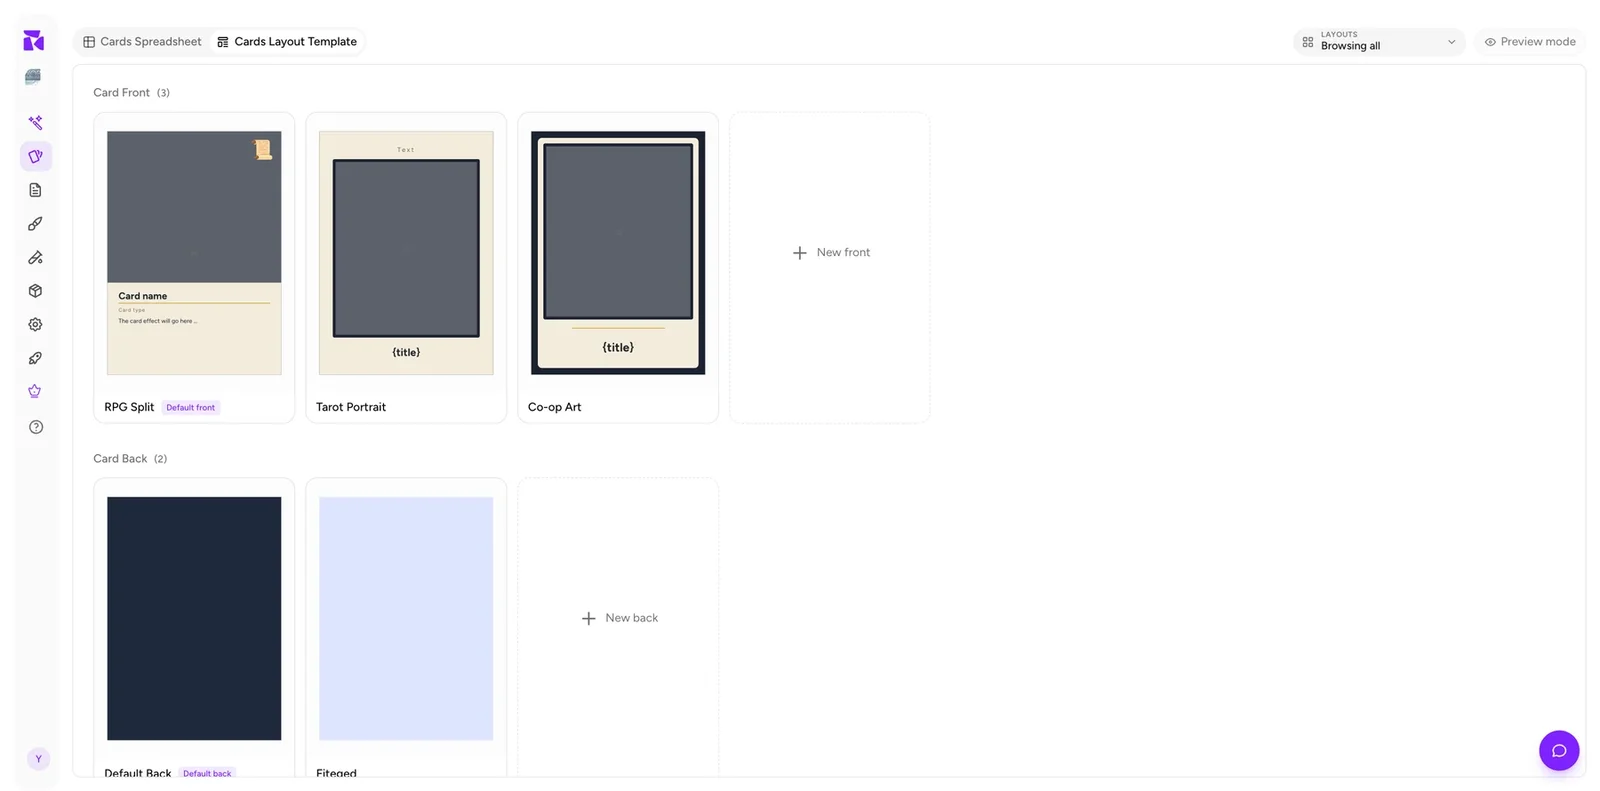
Import / Export → New project from a PDF or Illustrator file…for PDFs and.aifiles with one card per page.) - Browse all (grid): a full-window view of every layout as a thumbnail, split into Card Front and Card Back, each with a New front / New back tile at the end. This is the better view when you have more than a handful of layouts, because you can see the designs rather than just their names.
Hover a row in the dropdown and a pencil and a bin appear on the right, for renaming and deleting that layout in place.
A new front layout is added at the bottom of the FRONT list, which is usually where you want it: below the specific rules, above nothing.
Setting the default
Click Set default next to any layout. The star moves.
Each group needs exactly one, and it should be the layout you're happy for an unclassified card to use. In practice that means your plainest, most forgiving design, the one that looks fine even when half its properties are empty.
Don't put a condition on the default. ShuffleKit warns you if you try:
This is the front fallback (★). It catches every card that matches no other rule, so this rule won't hide it from any card. Put the rule on another front layout instead.
The reasoning is worth internalising: a condition on the catch-all is inert. Cards that fail it still land there, because nothing else caught them. The rule can only ever be true or irrelevant, never exclusionary.
A project with only one front layout gets a quieter, grey note rather than that warning, because nothing is wrong yet: "Your only front layout — every card uses it. This rule starts filtering once you add a second front layout." The rule you wrote is valid; it simply has nothing to filter against until a second layout exists, and the note disappears on its own once one does.
Faces, not only card backs
The second face of a card works identically: its own list, priority and starred default. The same rule applies to a board or mat's Back, a screen's Inside, and any other type with multiple named faces. Dice get the same face-by-face model with numbered faces rather than a shared Back.
Most card projects need exactly one back, unconditional and starred. Resist the urge to build more until a real need appears. Every extra layout is another thing that can resolve wrongly. See Print & Ship for the product-specific print result.
Checking your work
Three views tell you whether the priority list is doing what you think:
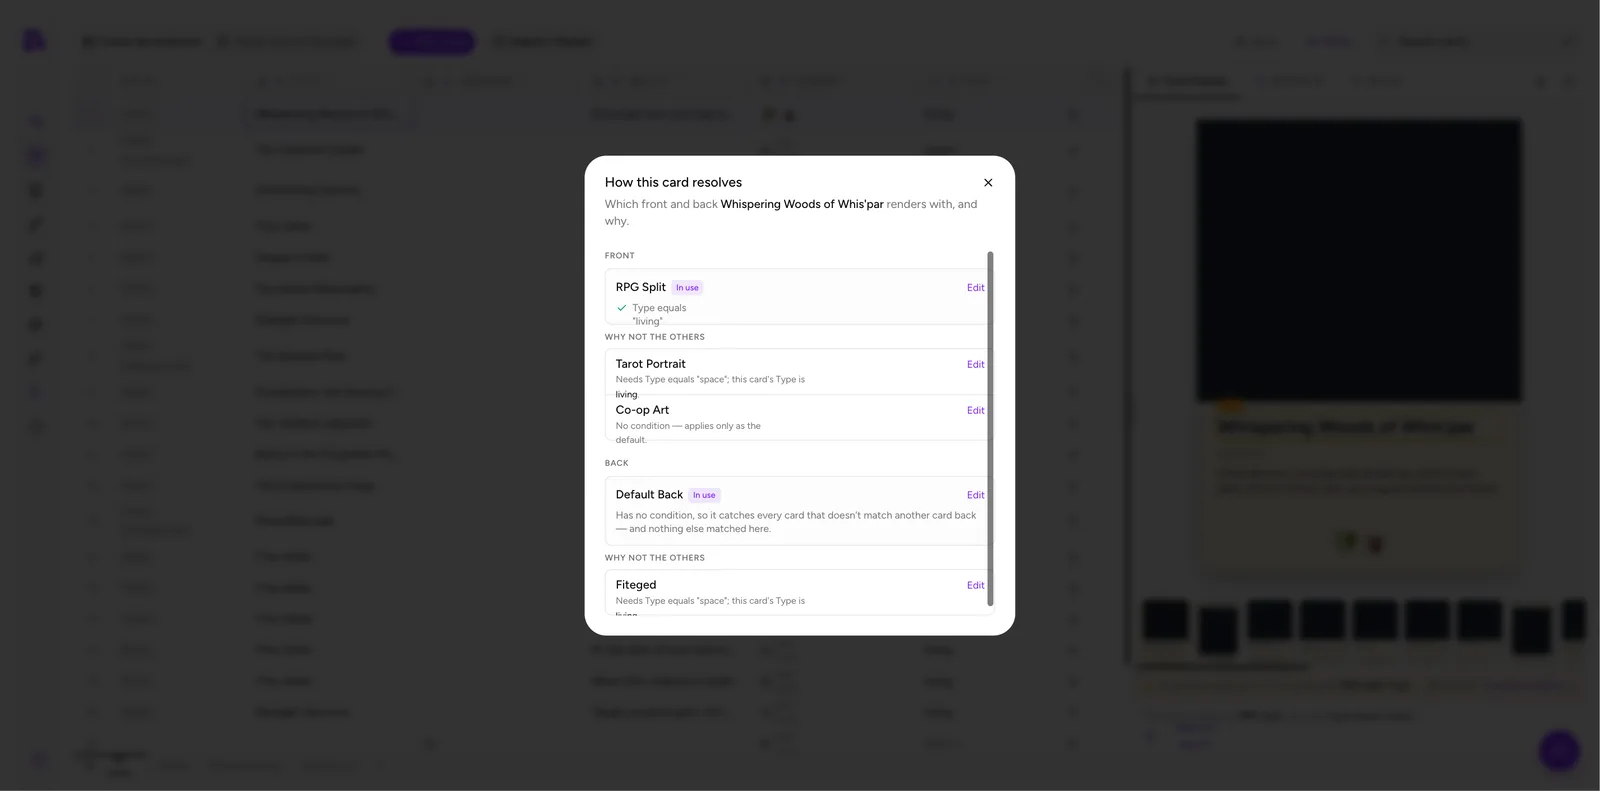
Per item: the live preview in Data states the outcome in a sentence, and Why this layout? breaks down every layout that didn't win and why. See Conditions.
Per rule: the condition popover counts live as you type: "Matches 8 of 19 cards · 5 will use this layout (3 match a higher-priority layout first)." That second number is the one that matters.
Per layout: Preview mode in the editor pages through the active collection's items that match the layout you're editing. It filters on the condition alone, so an item claimed by a higher-priority layout still appears here. If the count looks far off, check the priority order before you touch the rule.











