
This tutorial follows one job from start to finish: getting a playable copy of your game out of a home printer. It covers cards, boards, tuck boxes and score sheets, all of which print through the same PDF Print Sheet export. Every option in that dialog is listed in Import & Export; this page is about which ones to use and in what order.
PDF export needs a Hobby or Indie plan. On Free you can open the dialog and set it up, and the button reads Upgrade to Export.
Open the PDF print sheet
- Open the collection you want to print: a deck, a board collection, a box, a score pad collection.
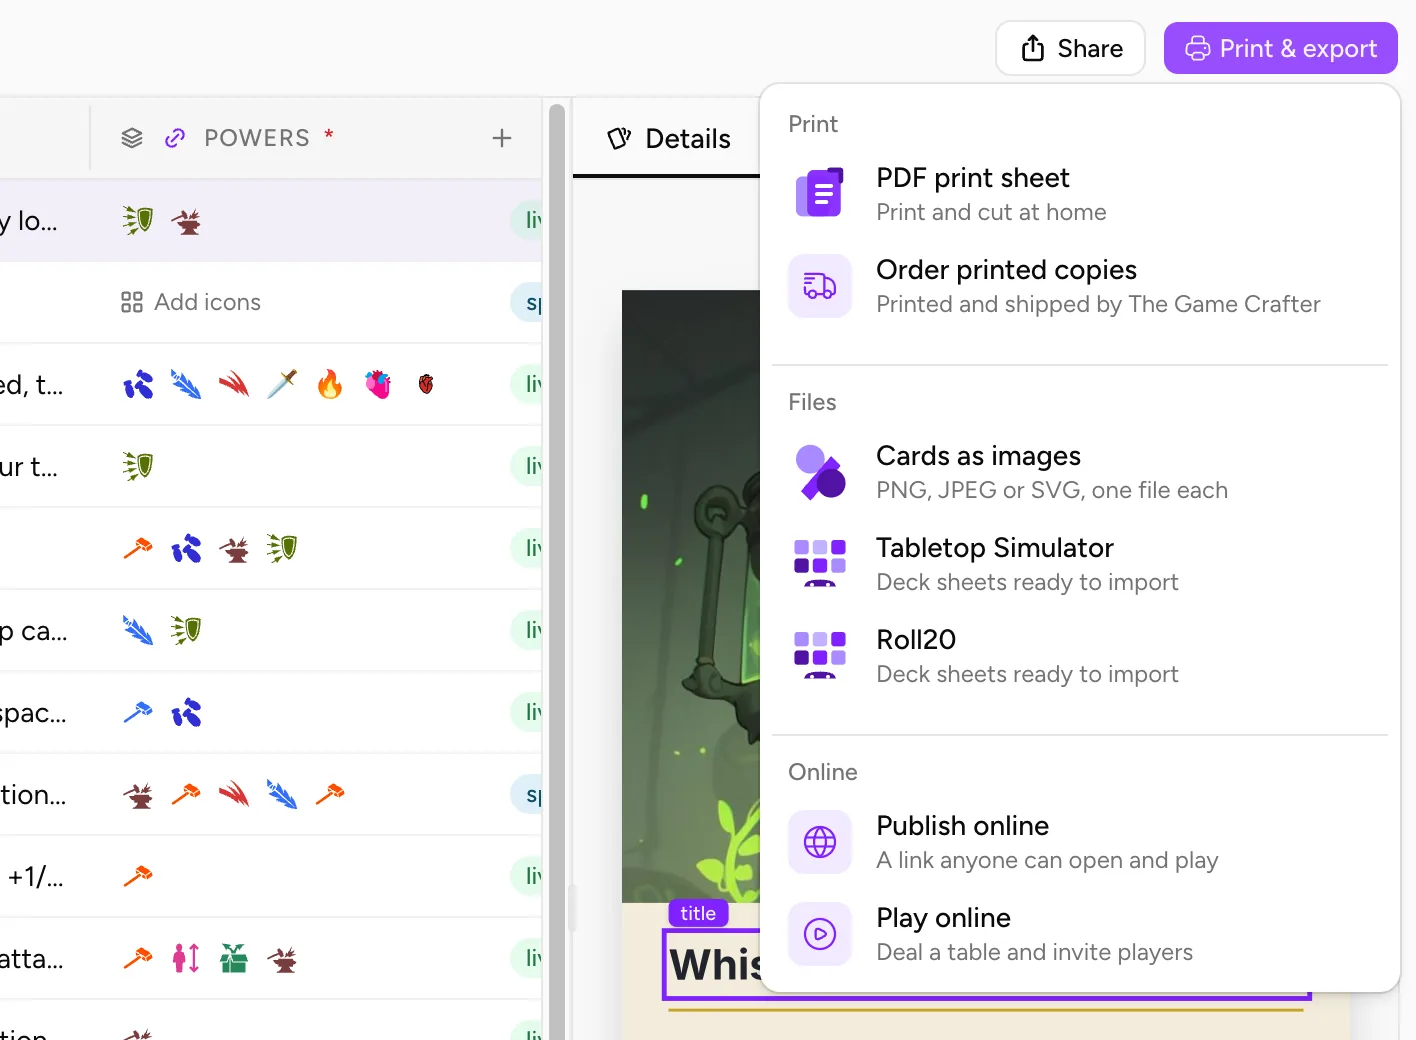
- Click Print & export at the right end of the bar (on a narrow window it shows as an icon only) and choose PDF print sheet, the first item under Print. File → PDF Print Sheet... does the same.
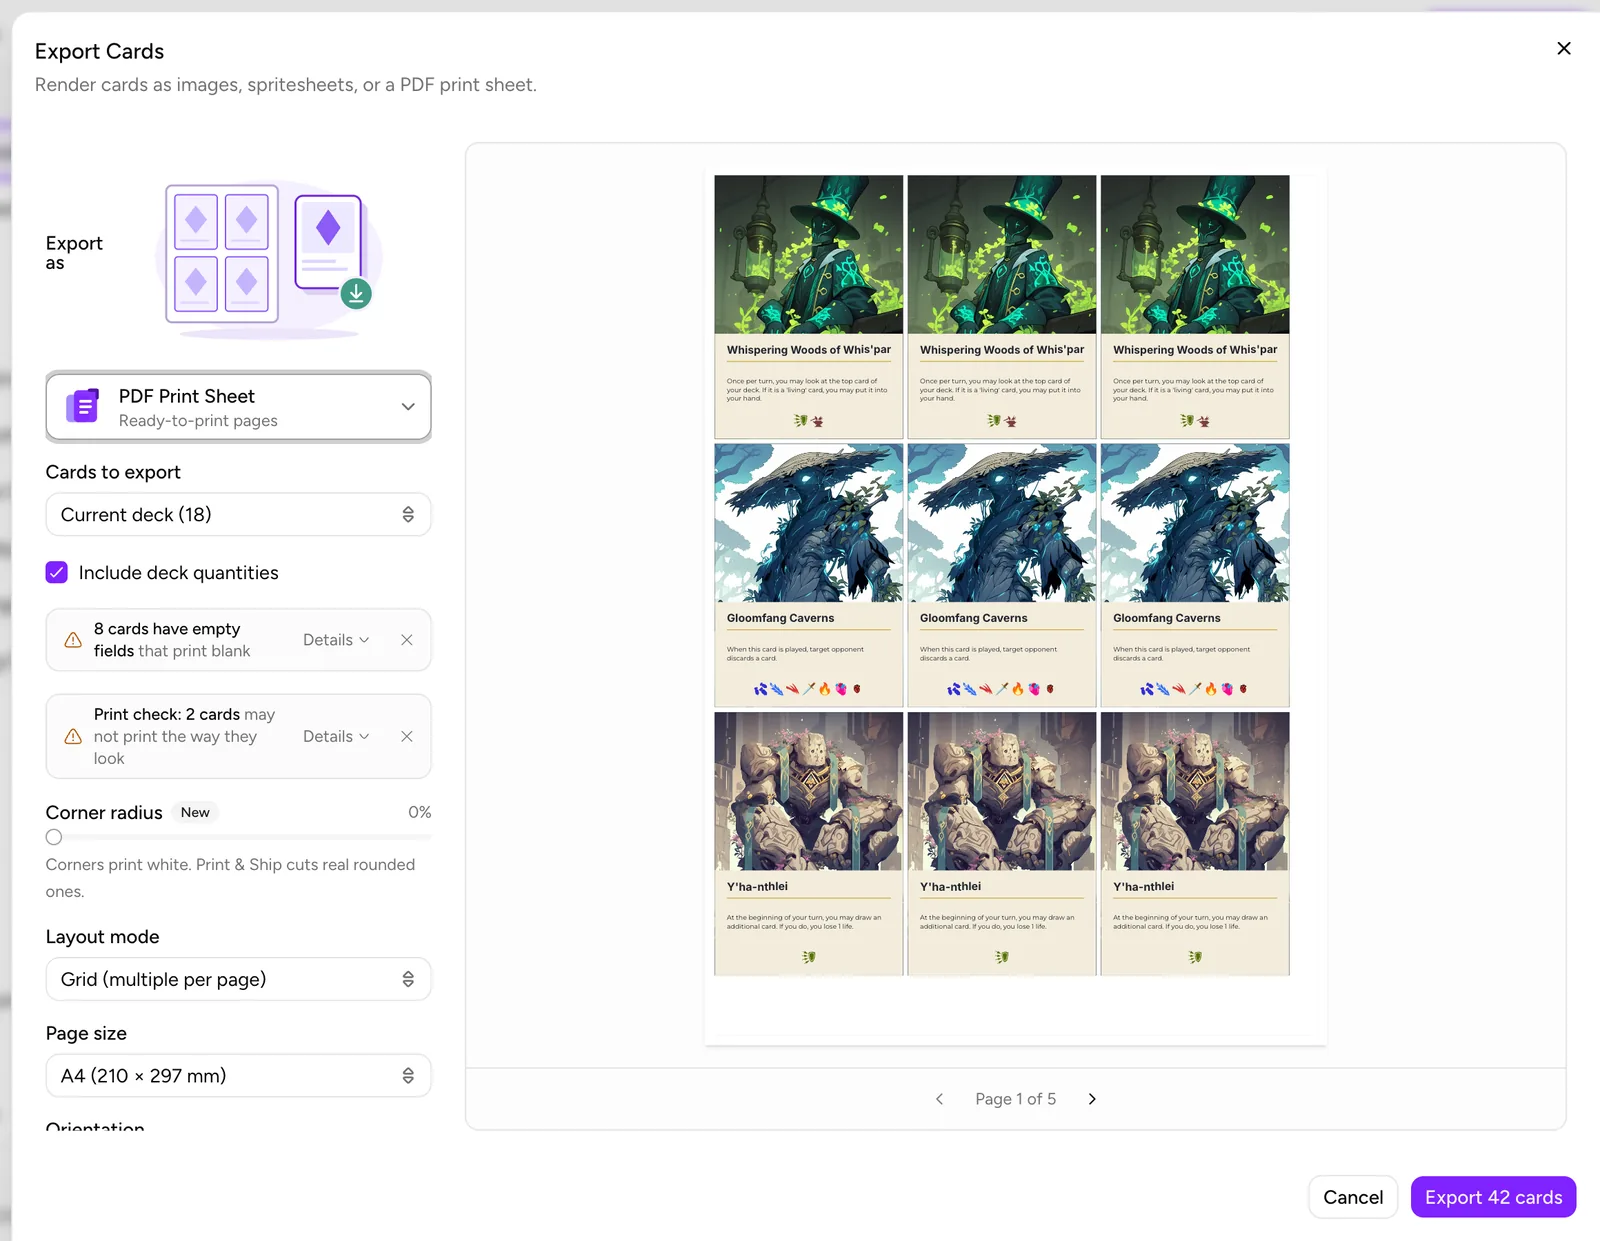
- The export dialog opens on PDF Print Sheet, with the settings on the left and a page-by-page preview on the right.
The dialog prints one collection per run. For a game with a deck, a board and a box, you export three PDFs.
Cards to export starts on the deck you are in. Inside a deck, Include deck quantities is on, so a card with QTY 3 is laid out three times. Click any card in the preview to leave it out of this run.
Set up the page
Work down the settings column in this order:
- Page size: pick the paper in your printer. A4 is the default; US Letter (8.5 × 11 in), A3, US Legal and Tabloid are also offered.
- Layout mode: Grid (multiple per page) for cards, tokens and other small pieces. One card per page (the name follows the collection, such as One board per page) for anything about the size of the sheet.
- Orientation: leave it on Auto. Auto tries portrait and landscape and names the one it picked, for example Auto · Landscape: the one that fits more pieces, or with one piece per page, the one that prints it bigger. Portrait wins a tie.
- Maintain original card size is on by default and keeps each card at its designed size. Turn it off only if you want to choose Cards per row yourself, which stretches or shrinks the cards to fill the row.
- Printed size appears in one-per-page mode, or while the size is kept. Canvas prints the canvas at 300 DPI. If you designed edge to edge on a canvas that should trim to a standard card, pick that size (such as Poker (2.5 × 3.5 in)) and the trimmed card is scaled to measure exactly that.
- Corner radius: leave it at 0%. On a PDF, rounded corners are filled white, so you would be cutting around white corners with no bleed behind them.
Under the grid settings, a line reads how many pieces fit on each sheet, such as 9 cards per sheet. If your settings hold fewer than the paper could, it adds the best fit, for example 6 cards per sheet · best fit is 8.
Print one test sheet first
Before you print the run, print one sheet and measure a card with a ruler.
Print dialogs scale pages differently: one printer defaults to Fit to page, another to Actual size or 100%. Compare the card on paper against its intended size (the Printed size you picked, or the canvas size shown in that control). If it doesn't match, or the page comes out cropped, change the scale setting in your print dialog and print the test page again. Once one card measures right, print the rest with the same settings.
Do this every time you change printer, paper size or the Printed size option.
Double-sided cards
When the collection has back layouts, a Card back control appears below the page settings:
- Auto (match card conditions) gives each card the back its conditions pick, falling back to the project's default back. The dialog starts here when the project has a default back.
- None prints fronts only.
- A named back layout puts that back behind every card.
With a back chosen, each page of fronts is followed by a page of backs, and Double-sided flip appears. Set it to the edge your printer turns the sheet on: Long edge (most printers) or Short edge. The back pages are mirrored to match, so choose the same edge in your printer's double-sided setting.
For the test, print the first front page and its back page only, then hold the sheet up to a light. If the backs sit behind the wrong fronts, the flip edge in the dialog and the one in your printer disagree. If they are shifted a few millimetres, that is your printer's paper feed: give the back art some margin rather than relying on perfect alignment.
Crop marks, bleed and cutting
Tick Include crop marks and bleed if you will cut the cards out. Each card gets a 1/8 in bleed, stretched from its edges, and short black marks on the cut line at each corner. If your layout already has a bleed drawn in, the option reads Include crop marks and marks the cut at the edge of that bleed.
With bleed on, a cut that drifts slightly lands in more artwork instead of a white sliver.
Before exporting, read the Print check line if one appears: "Print check: N cards may not print the way they look". Details lists text within 1/8 in of the cut, pictures under 300 DPI at the size they print, and backgrounds that stop short of the bleed. It is a warning only; the × prints as it is.
Cutting:
- A guillotine or rotary paper trimmer gives the straightest edges. Line the blade up with a pair of crop marks and cut the whole row in one pass.
- A craft knife with a metal ruler and a cutting mat works for small batches. Score lightly first, then cut through.
- Card stock of around 200 to 300 gsm (roughly 80 to 110 lb cover) handles like a card; check your printer's specifications for the heaviest paper it feeds. Printer paper slipped into a card sleeve in front of an old playing card is a good playtest option.
- A corner rounder punch gives you rounded corners after cutting.
Boards bigger than the page
A board or mat that doesn't fit the page's printable area is shrunk to fit, never split across sheets. The dialog says so beside Page size: "Scaled to N%. This board is larger than A4's printable area." (on a phone, the Page setup row shows Scaled to N% too).
If a larger offered paper would hold it at true size, a button reads Use A3 for true size (or Tabloid, whichever is the smallest fit). Click it and take the file to a printer with that paper. If nothing offered is big enough, which is the case for the 9 × 18 in Bi-Fold and 18 × 18 in Quad-Fold boards, the dialog says "No offered page size fits it at true size."
Your options for a large board:
- Print it scaled. A board at 80% still plays, as long as the cards and tokens that sit on it still fit their spaces.
- Design it at a smaller size, such as the Square Board (8 × 8 in) or Half Board (5 × 10 in), both of which fit A4 and Letter at true size.
- Export it as PNG Images and have a print shop print it on large paper (below).
For one board per sheet, use One board per page.
Tuck boxes
A box collection prints its whole flat dieline. Instead of crop marks, the dialog offers Include cut & fold guides, on by default. It prints the die line in red and the creases in blue over the artwork, so you know where to cut and where to fold.
Keep boxes at 100%. If the box is larger than the page, the warning adds "A dieline printed small folds into a box that will not hold its cards." Switch to the page size it suggests, or print it elsewhere. Use One box per page, cut along the red line, score the blue lines with the back of a knife against a ruler, then fold and glue the flaps.
Score sheets and other one-page pieces
Score pads (the Large Score Pad (8 × 10 in) is the page-sized one) print one design per row: each item in the collection becomes its own page. Choose One score pad per page, A4 or US Letter, and leave crop marks off, since a sheet that keeps its own margin has nothing to trim. For a pad, print that page as many times as you need from your print dialog.
Several print-and-play templates are built on this size, including the score sheets and the paper dice, where each sheet carries one die's cut and fold net drawn as part of the design. Print those the same way: one per page, no crop marks, and measure a test sheet before printing a full set.
Taking files to a print shop
A copy shop can print on heavier stock, bigger paper and with straighter cuts than most home setups. Two ways to hand over the files:
- The PDF Print Sheet, set up as above. Ask the shop to print a single test sheet and check it against your card size before the run.
- JPEG Images or PNG Images from Print & export → Cards as images: one file per card, in a
.zip. Each image is twice the canvas's pixel size, so a 2.75 in canvas (825 px) arrives 1650 px wide, well above the 300 DPI most shops ask for. JPEG has white corners and smaller files; ask the shop which format they prefer. Image files add no bleed and no crop marks: each is the canvas as you designed it, so if the shop needs a bleed, it has to be in the layout.
Run a PDF export once even if you send images, so you see the Print check line, which the image formats don't show.
For printed, cut and boxed copies without any of this, Print & Ship sends the game to The Game Crafter.
Related tutorials
- Import & Export: every export option and what each format downloads.
- Print & Ship: ordering printed copies.
- Card Collections & Quantities: QTY and how it sets the print count.
- Components & Collections: board, box and score pad sizes.











