
Conditions are how an item picks its own design. Instead of assigning a layout to each item by hand, you write a rule on the layout ("use me when Type equals space") and every matching item adopts it automatically. Conditions only inspect the active component type's properties, so board data and card data never compete.
This is the feature that lets a 300-card set with six frame styles stay maintainable.
How resolution works
Every layout sits in a numbered priority list, front and back kept separately.
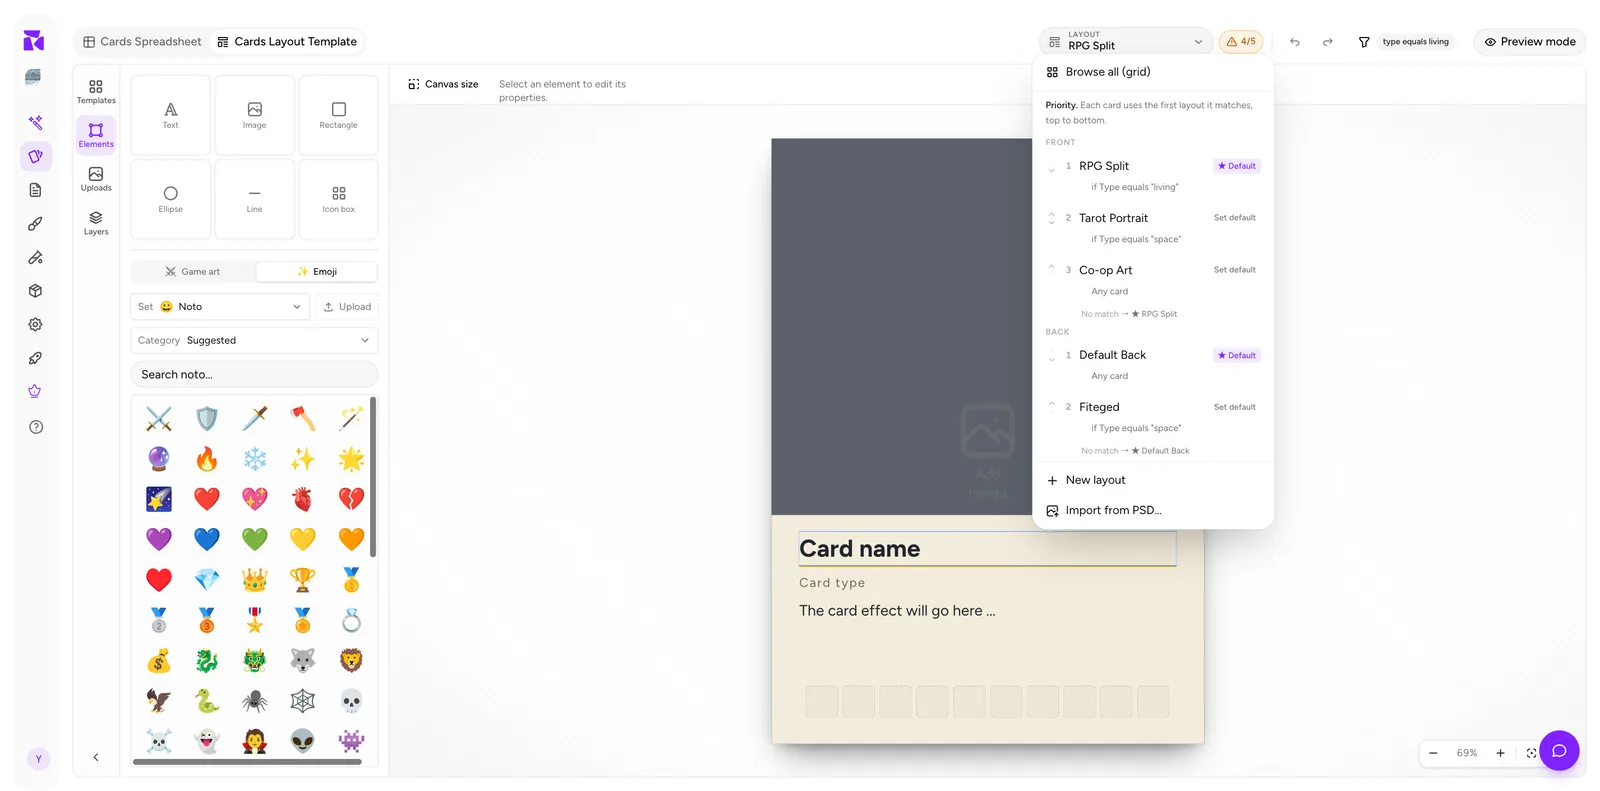
The rule stated at the top of that list is the whole model:
Priority. Each card uses the first layout it matches, top to bottom.
So for the FRONT group above:
RPG Split: if Type equals "living"Tarot Portrait: if Type equals "space"Co-op Art: Any card
A card with Type = living stops at 1. A space card fails 1, matches 2. Anything else falls through to 3. The footer line (No match → ★ RPG Split) names the starred Default, which catches whatever nothing else claimed.
Reorder layouts with the up and down arrows next to their numbers. Order is the logic; get it wrong and a broad rule higher up will swallow cards meant for a specific one below.
For the priority model on its own, see Layouts & Priority. This tutorial focuses on writing and testing the condition itself.
Writing a condition
- Open Design and select the layout and face in the header selector.
- Click the condition chip in the header (it reads
type equals living, or justConditionif empty). - Set Property, Operator and Value.
- Click Apply.
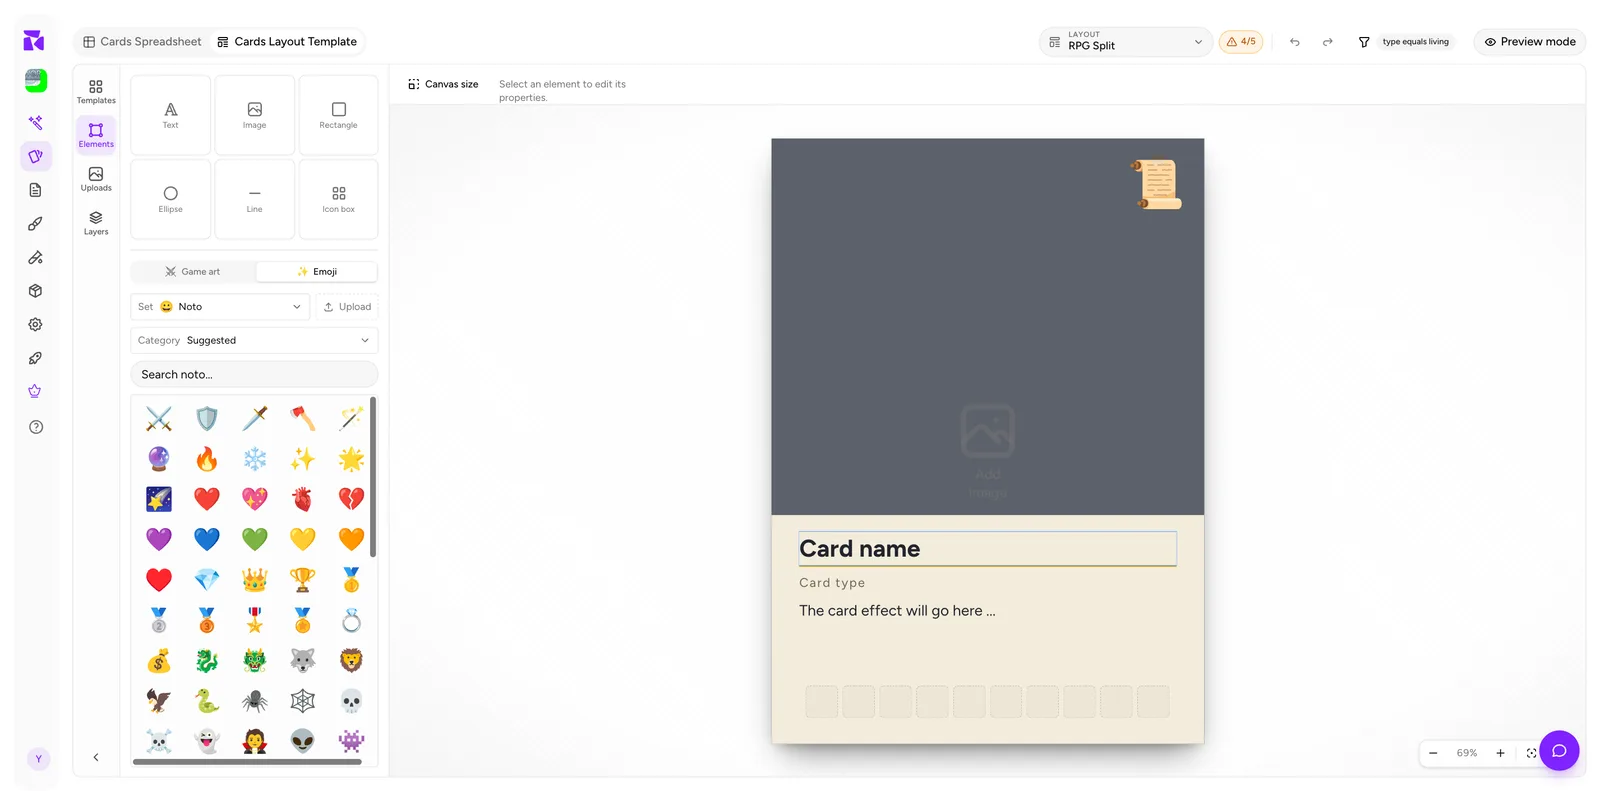
A first useful condition
Try this small example before building a larger ruleset:
- Make
Typea Select property with options such aslivingandspace, then give a few cards each value. - Create or choose two front layouts. Leave one as the starred default and make sure it has no condition.
- On the other layout, set Property to
Type, Operator toequals, and Value toliving. - Select a living card in the spreadsheet. Its preview should use the conditioned layout. A space card should fall through to the default.
If both layouts look the same, temporarily give them visibly different backgrounds or names. That makes resolution mistakes much easier to spot while you are learning the system.
Operators
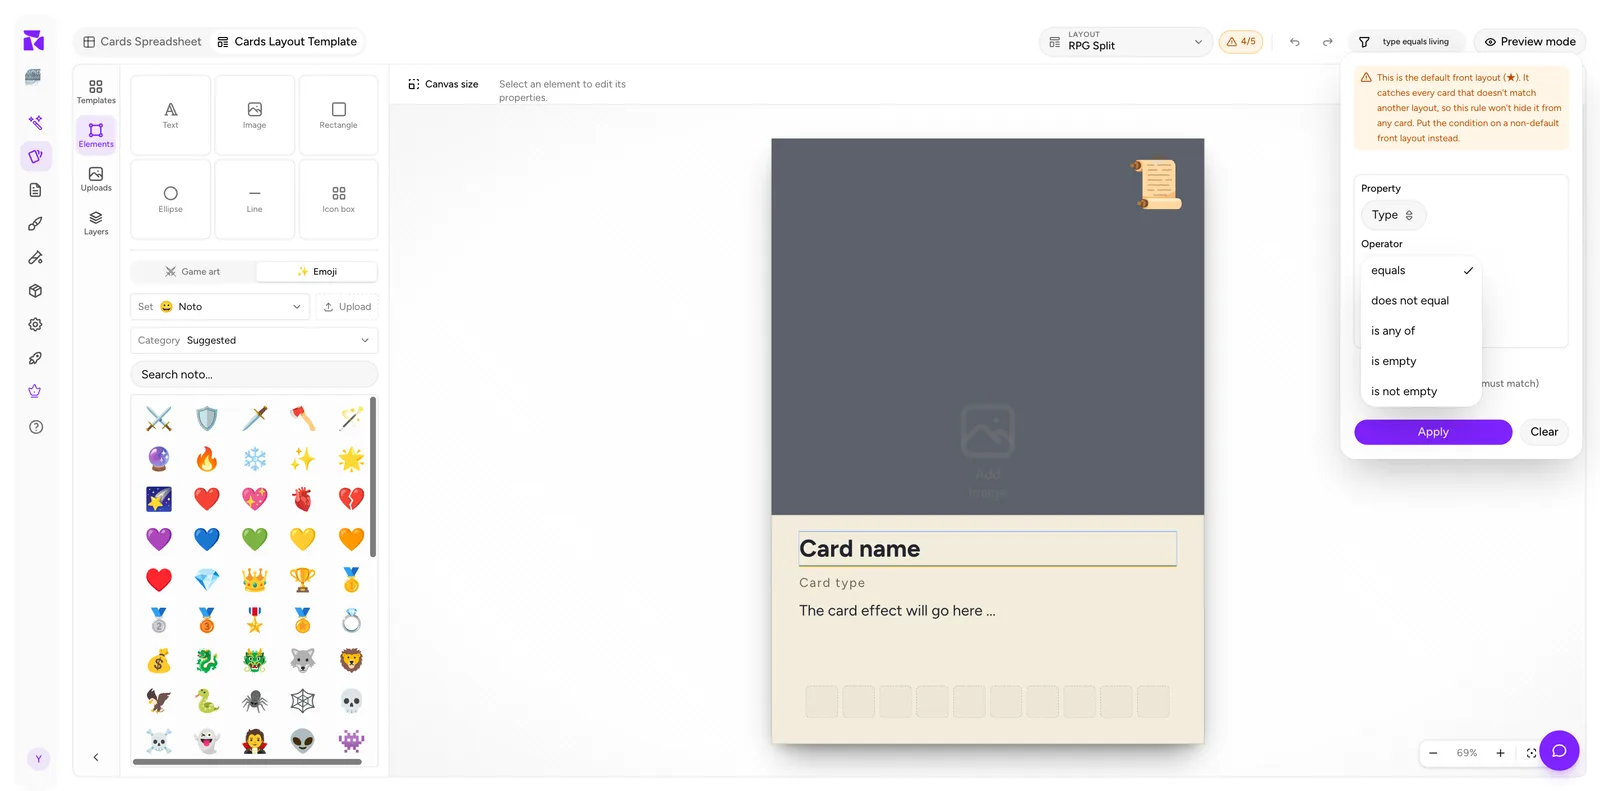
| Operator | Matches when |
|---|---|
| equals | The property is exactly this value |
| does not equal | The property is anything but this value |
| is any of | The property is one of several values |
| is empty | No value has been entered |
| is not empty | Any value has been entered |
| greater / less than (and or equal) | Numeric comparisons |
The list you see depends on the property's type: Number properties offer the comparisons, and is any of appears on Select properties.
is any of is the one people miss. Rather than three near-identical layouts for fire, water and air, write one layout with Element is any of fire, water, air.
Multiple conditions
Click Add condition (all must match) to stack rules; each extra clause joins with an And. It's AND, never OR.
To express OR, either use is any of on one property, or split it into two layouts at adjacent priorities.
Don't put conditions on the default
If you add a condition to the starred default layout, ShuffleKit warns you:
This is the front fallback (★). It catches every card that matches no other rule, so this rule won't hide it from any card. Put the rule on another front layout instead.
The default is the catch-all. A condition on it is inert: cards that fail it still land there, because nothing else caught them. You can see it in the example above, where the starred default RPG Split also carries a condition; it works because every card happens to match something, but the cleaner setup is to put specific rules on specific layouts and leave the default unconditional.
Seeing conditions resolve
The Card Details panel tells you the outcome for whichever card is selected, at the bottom:
This card uses layout RPG Split, because Type equals "living".
Select a different card and it changes:
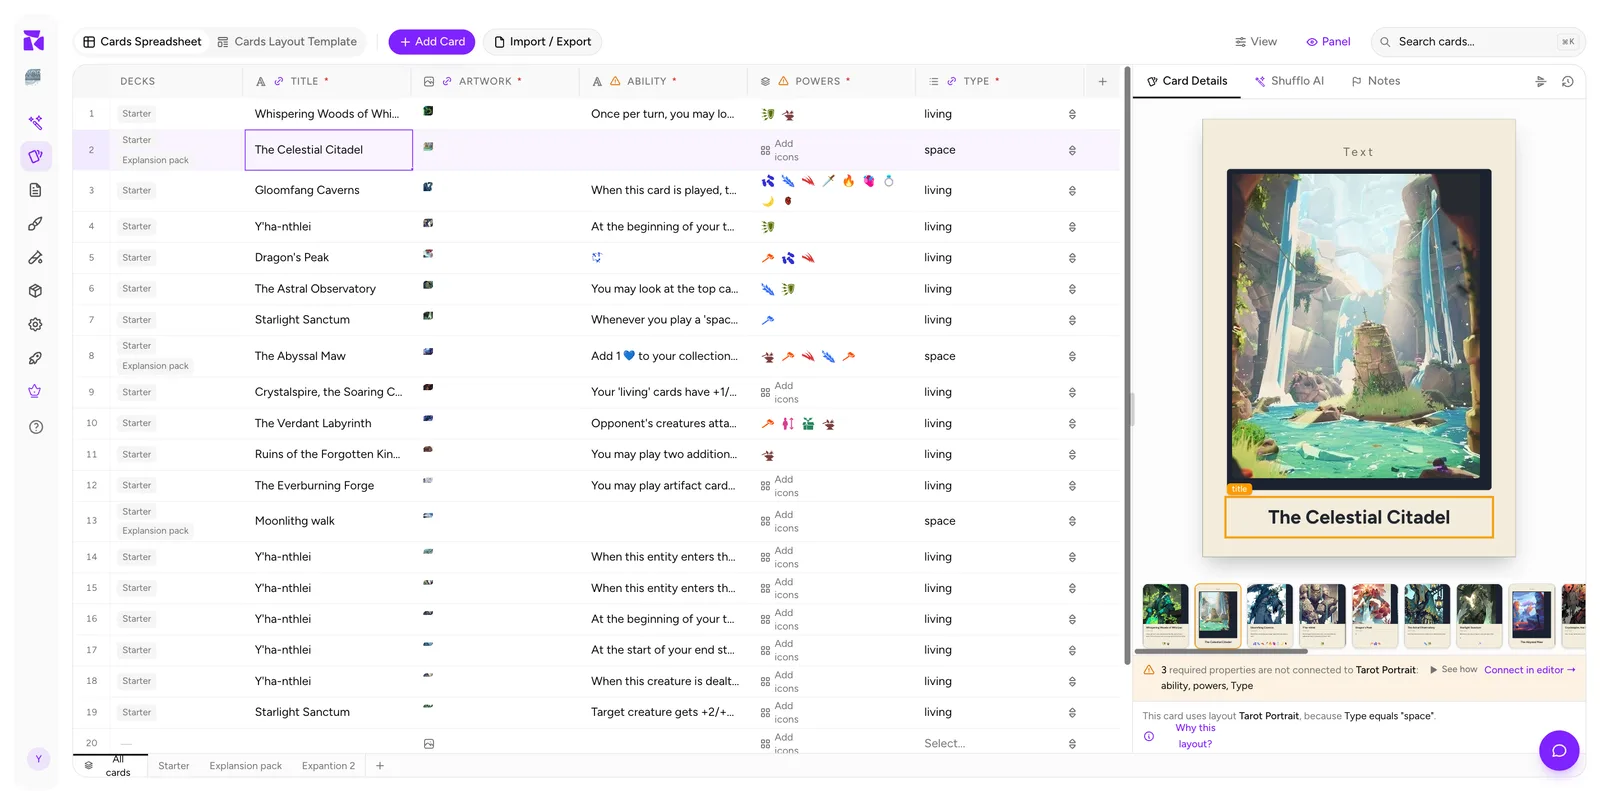
Same project, same rules, different Type, and the preview switches to Tarot Portrait.
"Why this layout?"
When the outcome surprises you, click Why this layout? under the preview:
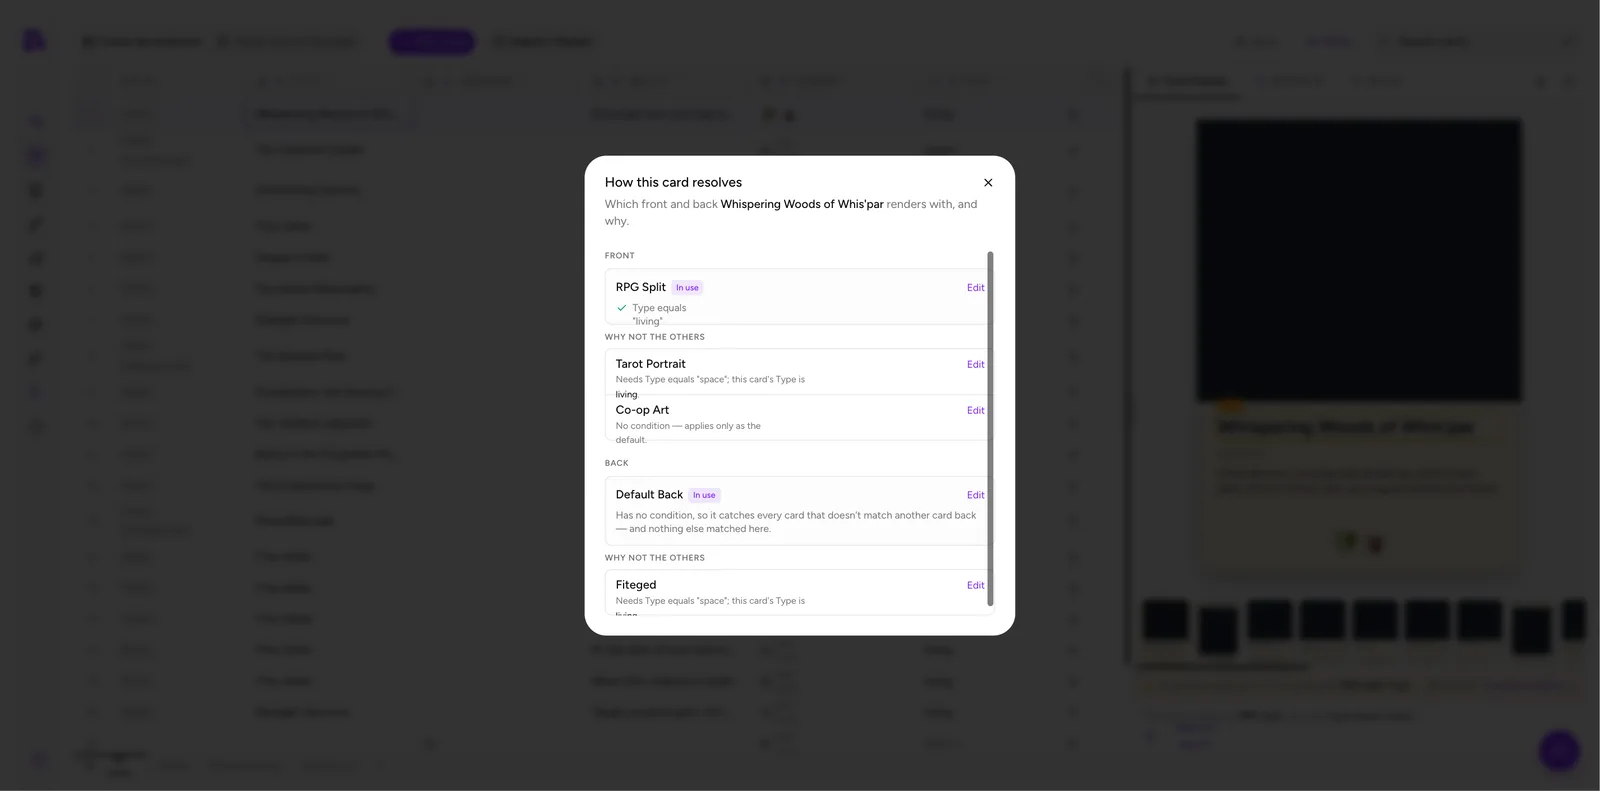
The resolution dialog shows, for FRONT and BACK separately:
- The layout In use, and the condition it matched.
- WHY NOT THE OTHERS: every layout that didn't win, with the reason:
- "Needs Type equals "space": this card's Type is living."
- "No condition: applies only as the default."
- An Edit link next to each, to jump straight to that layout.
This is the debugger. Whenever a card renders with the wrong frame, start here rather than guessing.
Per-element conditions
Layout conditions choose the whole design. Advanced visibility hides or shows a single element per card.
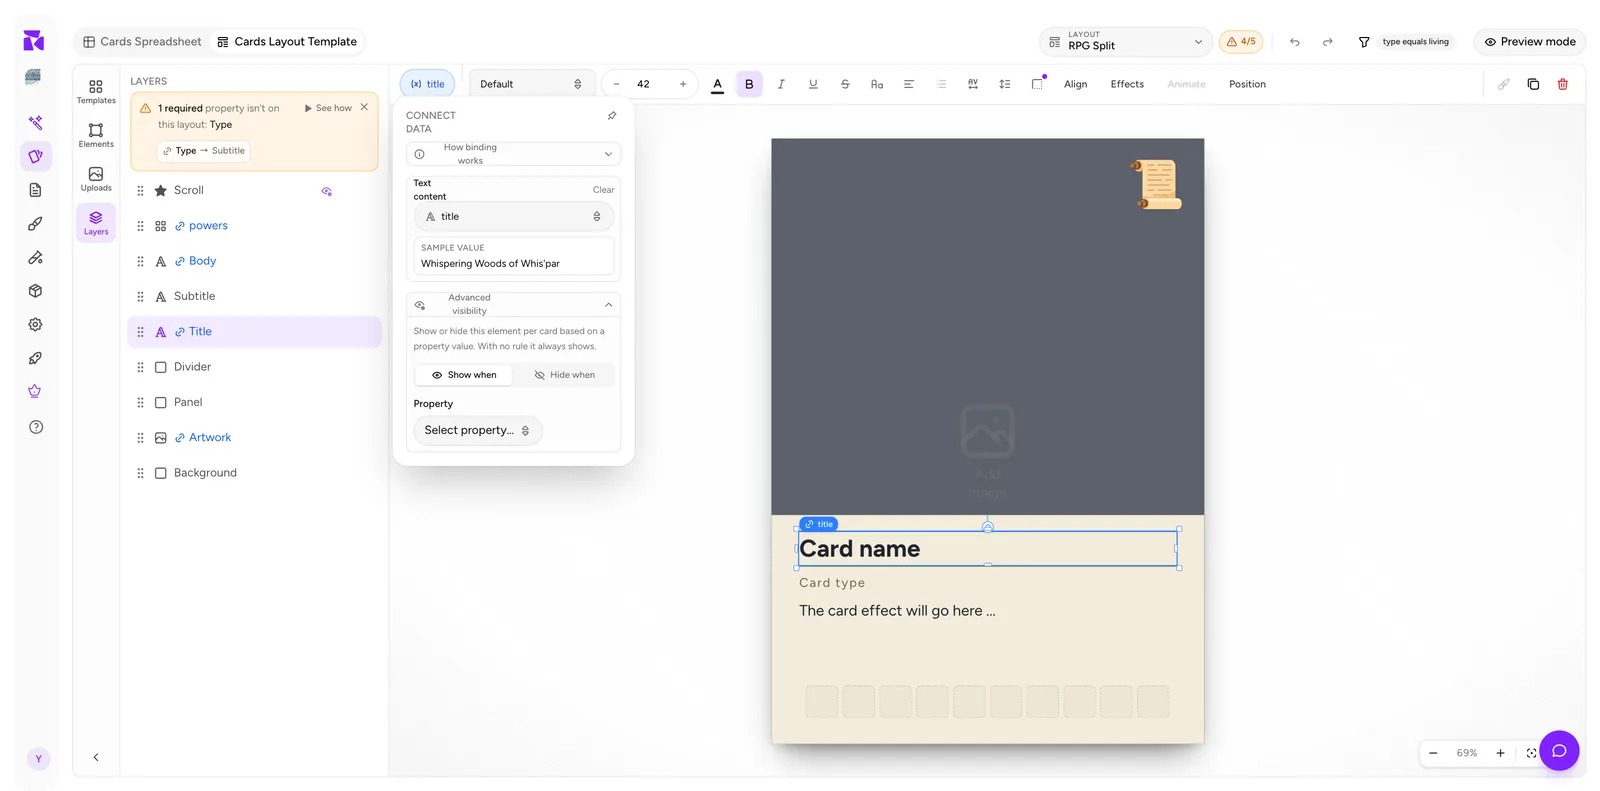
- Select the element on the canvas.
- Click its binding pill to open CONNECT DATA.
- Expand Advanced visibility.
- Choose Show when or Hide when, then pick a property, operator and value.
Show or hide this element per card based on a property value. With no rule it always shows.
Typical uses: a "legendary" foil bar that only appears when Legendary is true; a flavour-text box that hides when the field is empty (Flavour is empty → Hide).
For the complete visibility workflow, see Element Visibility.
This keeps your layout count down. If two designs differ by one badge, that's one layout with a conditional badge, not two layouts to maintain in parallel.
Practical guidance
- Use Select properties for anything conditions read. Free text invites typos, and a typo silently drops a card to the default layout.
- Order specific → general. Narrow rules high, catch-alls low.
- Keep exactly one unconditional default per side. Front and back each need a starred fallback.
- Test with Preview mode. Step through all cards after changing priorities: that's where a swallowed rule shows itself.











