
Every card in ShuffleKit has two faces, a front and a back, and each face has its own designs. The front usually changes from card to card. The back is often one design for the whole deck, but it doesn't have to be: a back can change with the card's type or deck, and it can show the card's own data, such as the answer on a flash card.
This tutorial walks through the whole job, from the first back design to the printed sheet. The detail for each step lives in the tutorials linked along the way.
Where backs live
Open the Design tab and the Designs panel, the first tab in the editor's left rail. It lists the collection's designs one face at a time: a Front section, then a Back section, each with its designs in the order ShuffleKit checks them.
You may already have a back. When you create the first front design for a card collection, ShuffleKit adds one called Default Back: a dark slate card with your game's name in bold white across the middle. If you're at your plan's design limit at that moment, it skips the back without saying so, and you add one yourself later. Installing a whole pack with Use pack brings the pack's own card back and makes it the project's default instead.
To move between faces on the canvas, use the face tiles under it: one tile per face, labelled Front and Back. A face with no design yet shows a + tile whose tooltip reads Design the back.
Add a back design
- In the Designs panel, find the Back section.
- Click Design the back if the face is empty, or Add a back design at the end of the section if it already has one.
- Choose where the design starts:
- From a template switches the rail to Templates. A template lands on the face it was made for, so pick a back, for example the card back in a pack's row. Clicking a single design adds just that one.
- Blank design opens Create Layout with Side already set to Card Back. Name it, check the size matches your fronts, and click Create. The Auto-layout from my properties switch is only offered on the front, so a blank back starts empty.
- Import from PSD… brings in a Photoshop file; set Side to Back on its review step. See Import & Export.
If the back already has a design, both the template dialog and Create Layout ask Which cards use it? before adding the new one:
- Every card no rule claims makes it the back for every card (it takes over from the current one, which the line under the option names).
- Only cards where… gives it a one-condition rule, with a live count and pictures of the cards that would switch to it.
- None yet adds it under Not used until you decide.
One back for every card
A face has one design that catches every card no rule claims: the fallback. On the back, its row reads Every card, or Every other card once other backs have rules. For most decks that is the only back you need.
To make a different back the one every card gets:
- Hover its row in the Designs panel and open the ⋯ menu.
- Choose Use for every other card.
A design sitting under Not used has a Make default button in its amber strip that does the same thing. The toast that follows names the design that lost the slot and offers an undo.
The same choice is in Browse all, at the top of the Designs panel, which shows every design in a grid with Card Front and Card Back sections. Open a back tile's menu and choose Set as default back; the tile that holds the slot carries a Default back badge.
If every back has a rule and none is the fallback, the Back section warns: A card that matches no rule gets no back. Those cards print a plain back (see the export section below), so keep one back without a rule as the fallback.
A different back for each kind of card
Some games need more than one back: a player deck and an encounter deck, a faction per colour, or an expansion that should be told apart in the box. Give each extra back a rule:
- Add the back design as above, or pick an existing one.
- Click Add rule in the strip under its name (Edit if it has one), or choose Give it a rule… from its ⋯ menu.
- The popover reads "Use “
” for cards where". Pick a property, an operator and a value, for example FactionisEmber. Add another condition adds a row that must also hold. - Click Apply.
The row's strip now reads When Faction equals Ember, and the number of cards that get it shows under the design's name. Rules are checked top to bottom and a card takes the first back whose rule it matches; use the up and down arrows (Check this rule earlier, Check this rule later) to reorder them. Everything the rules don't claim gets the fallback.
To give a whole deck its own back without adding a column, use Deck (membership) as the property: Deck is any of Expansion shows in the panel as When in Expansion. Use Select properties for anything a rule reads, since a typo in a Text value silently drops a card to the fallback. Operators and ordering are covered in Conditions and Conditions In Depth.
More than one back design means players can tell those cards apart face down. That is usually the point for separate decks, but check it's what you want before shuffling them together.
Backs that show each card's data
A back is a layout like any other, so its elements can be connected to columns. Select a text box on the back, click the Connect data pill in the toolbar over the canvas and pick a column; every card then prints its own value there. See Connecting Properties.
This is how flash cards work: the question on the front, the answer on the back, so the answer lands behind its question when the sheet is printed double-sided. The back in the flash card templates is built this way, so adding it is a quick way to see a connected back.
Two things to know:
- A blank back starts with nothing connected, so connect its elements yourself.
- The preview's connection note (⚠ 1 required column not connected) only checks the front, so it won't warn you about a back you forgot to connect.
Check the backs in the preview
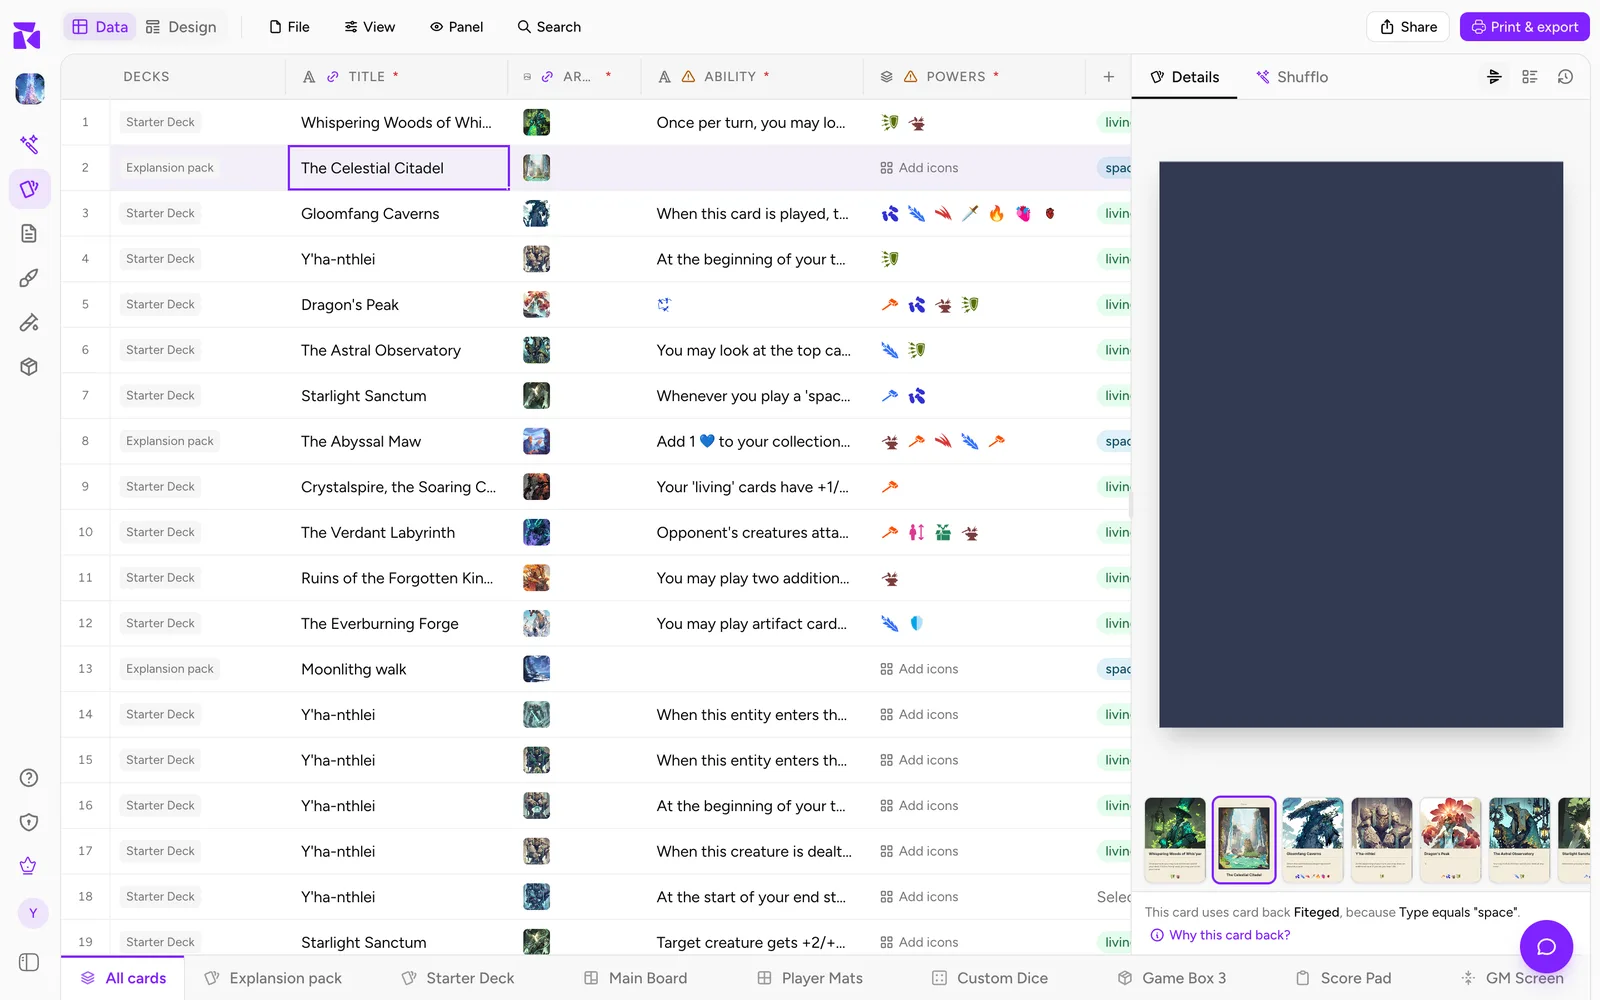
In the Data view, select a card and click the flip button at the top of the Card Details tab (its tooltip reads Show back). The preview turns the card over, and the line under it says which back it got and why:
This card uses Default Back, the catch-all card back: no other card back's condition matched.
When a card shows the wrong back, click Why this card back?. The dialog, titled Why these layouts?, explains the front and the back separately: the design In use and the clauses it matched, then every other back and why it lost. Use this beside a back that also matched moves it above the winner, which changes the order for every card. See Component Preview & Details.
Backs in exports
Every visual export has a Card back setting once the collection has at least one back design. It offers Auto (match card conditions), which gives each card the back its rules pick, None, or one back design by name for every card.
Card images. In File → Card Images (PNG / JPEG / SVG)... the setting starts on None, so the download is fronts only until you pick a back. With a back chosen, the backs are saved beside the fronts in the same format: one -back file when every card shares a back, otherwise one back file per card. A card no back matched gets no back file.
PDF print sheet. In File → PDF Print Sheet... the setting starts on Auto when the project has a default back, otherwise on None. With a back chosen, each page of fronts is followed by a page of their backs, mirrored so they line up after the flip. Set Double-sided flip to the edge your printer turns on, Long edge (most printers) or Short edge, and choose the same edge in the printer's double-sided setting. A card no back matched gets a blank white space on the back page, so the rest stay aligned. Print one sheet at 100% scale and hold it to the light before printing the lot.
Tabletop Simulator. File → Tabletop Simulator... exports the back beside the face sheet. When every card shares a back, it's a separate -back.png and you leave Unique Backs off when importing. When backs differ, it's a matching -backs.png sheet in the same grid; turn Unique Backs on, and turn Back is Hidden on as well so a held card doesn't show as a blank. The dialog's import box says which case you have.
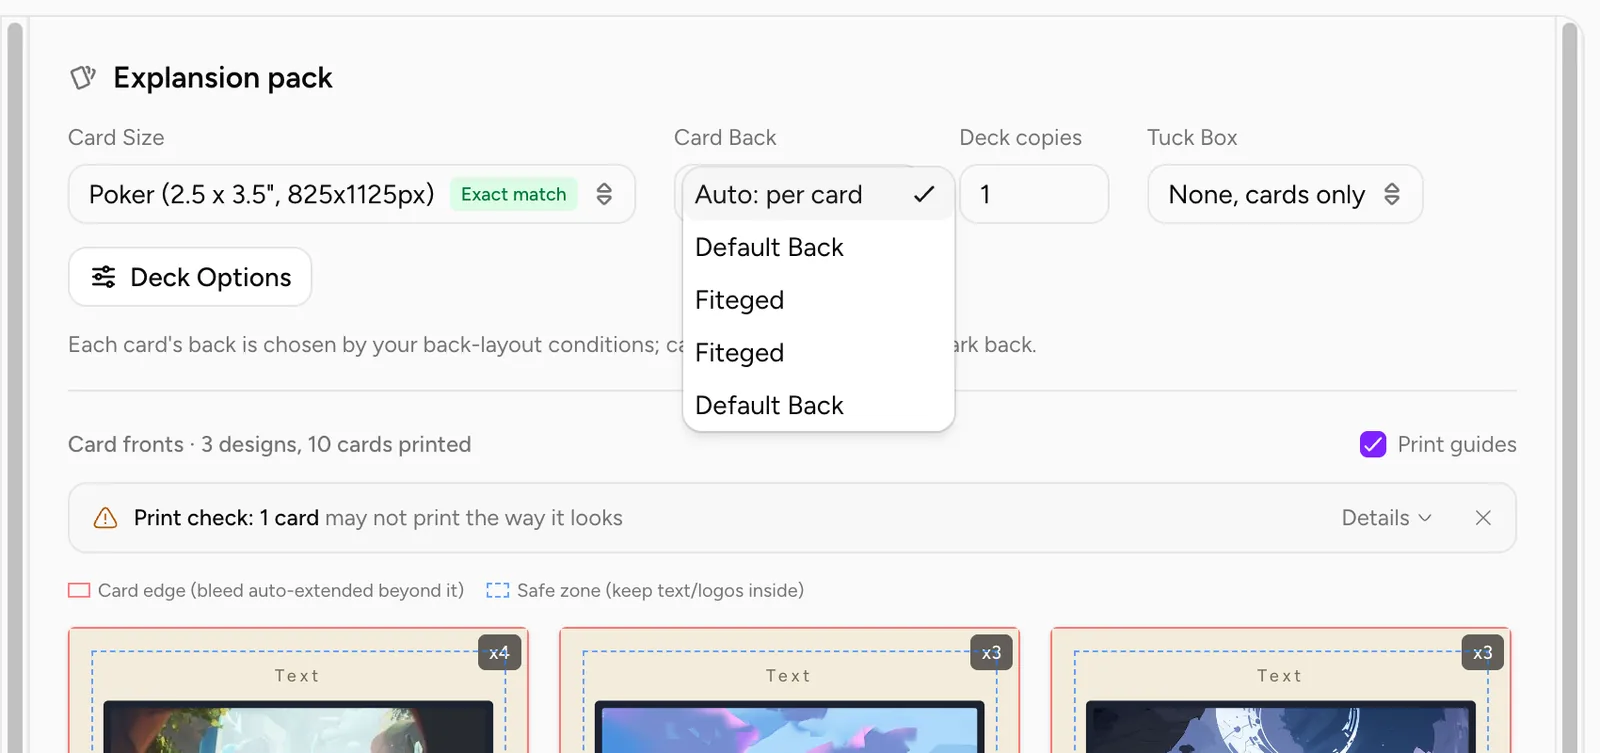
Print & Ship. Each deck has a Card Back setting in the row over its preview. Auto: per card (the default) uses your back rules; picking one back design prints it on every card in the deck. The line under the row names what a card with no matching back gets: your default back, or a dark back when there isn't one. The preview shows the backs that will print, headed Card Backs: 2 designs (or Card Backs: per card for a back with connected data), and warns when every card would print the plain dark back. See Print & Ship.
Before you print
- One back in the Back section reads Every card or Every other card.
- Every back with a rule shows a card count above zero.
- Flipping a few cards in the preview shows the back you expect on each.
- The export's Card back isn't on None when you meant to print backs.











