
A layout on its own is a static picture. Connecting (binding) an element to an active component property is what makes it show each item's own data. The picker is type-aware, so a board layout only offers board properties and a card layout only offers card properties.
The rule, in ShuffleKit's own words:
Pick a card property and the element will pull that value from every card: e.g. bind a text element to Name so each card shows its own name.
Switch on Preview in the canvas header to see real card values: with preview off, elements show their static fallback.
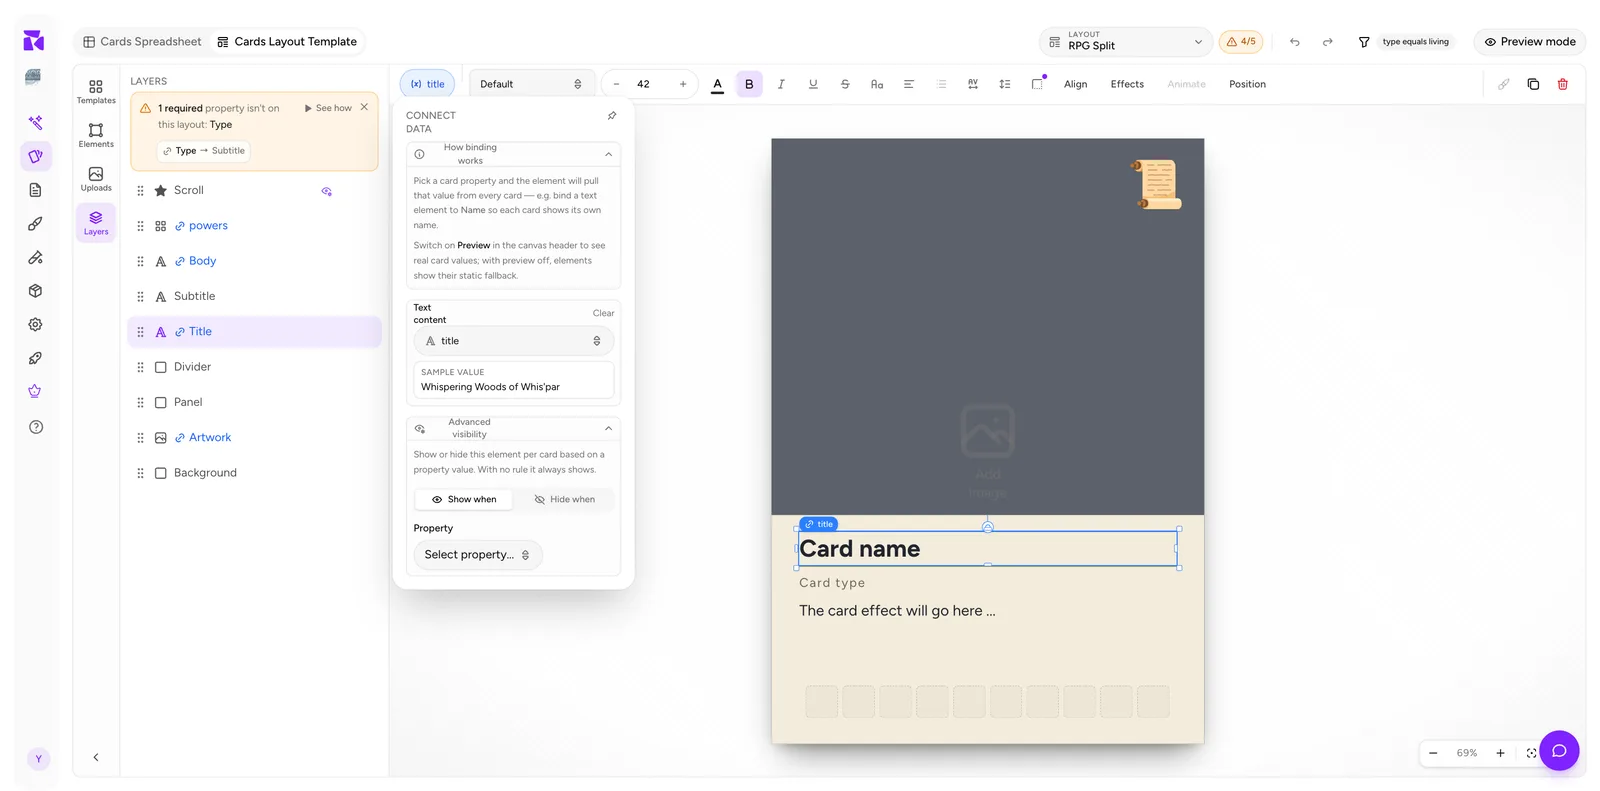
Connecting an element
- Open Design for the active collection.
- Click the element on the canvas: the text block, the art frame, the icon strip.
- Click the pill at the far left of the top toolbar. A dashed pill means "not connected"; a solid one shows the property name.
- Pick the property under Text content (or Image source / Icons, depending on the element type).
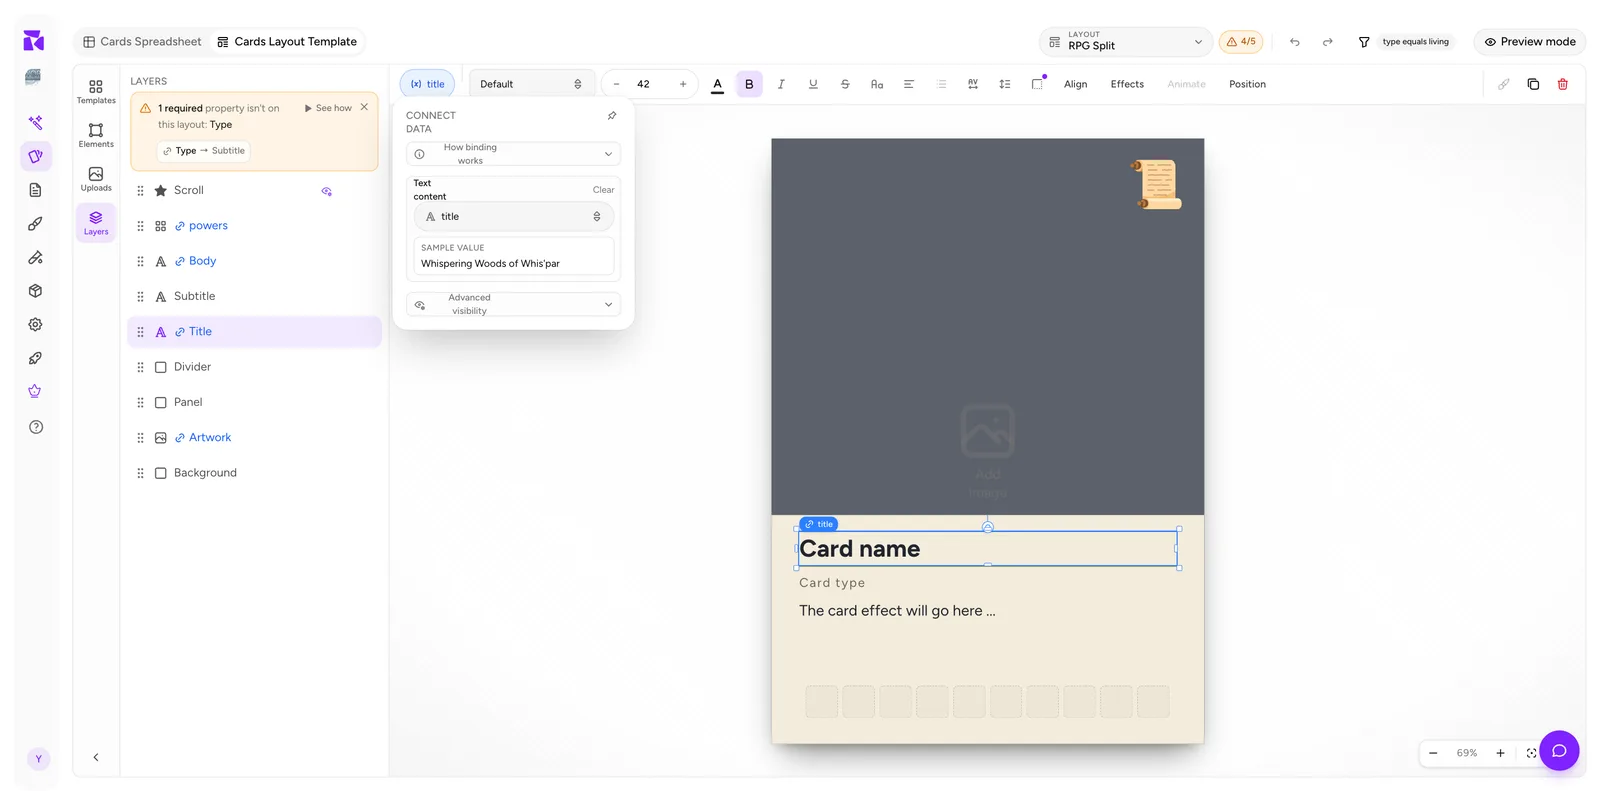
SAMPLE VALUE underneath shows what the current card would put there: instant confirmation you picked the right property.
Clear breaks the connection and returns the element to its static content.
For a first layout, wire the three common data paths separately: select a Text element and bind Text content to title, select an Image element and bind Image source to artwork, then select an Icon box and bind Icons to an Icon list property. The available slot and the properties offered change with the element type, so an artwork property will not appear in a text slot.
For the full editor sequence, see Layout Editor: A Full Tour. For the property types that determine which bindings are available, see Properties & Columns.
Selecting the element
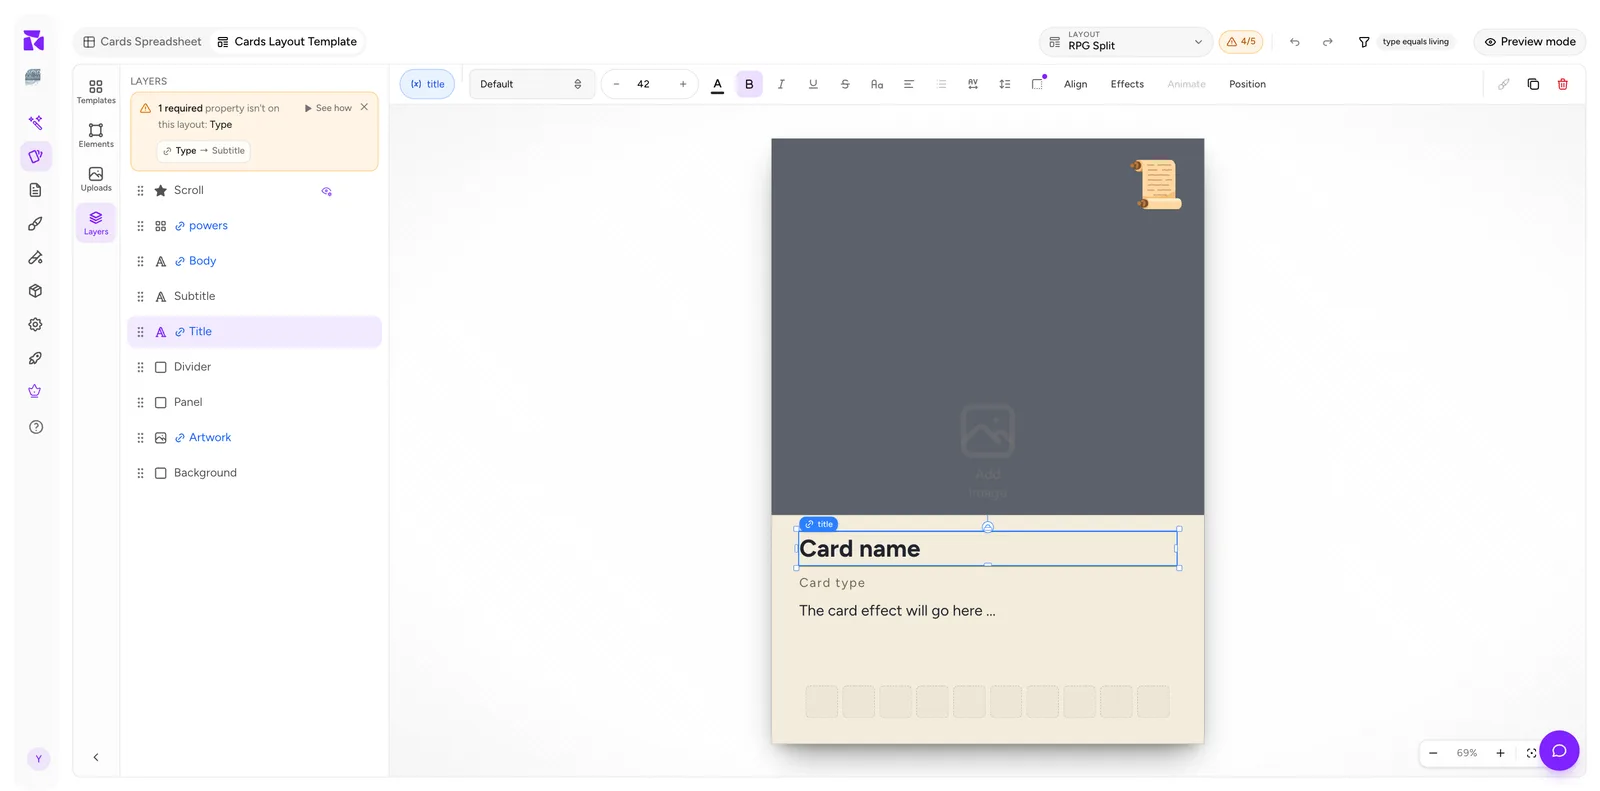
Click directly on the canvas, or pick it from the Layers panel. Layers is the more reliable route for elements sitting behind others.
Bound layers render in blue with a chain icon (powers, Body, Title, Artwork above). Unbound ones are plain (Subtitle, Divider, Panel, Background). Scanning that list is the fastest way to spot something you forgot to wire up.
The connection counter
The badge in the header (4/5) counts how many of the layout's properties are connected; it turns amber when some aren't, and a missing required property is the case that matters. Click it:
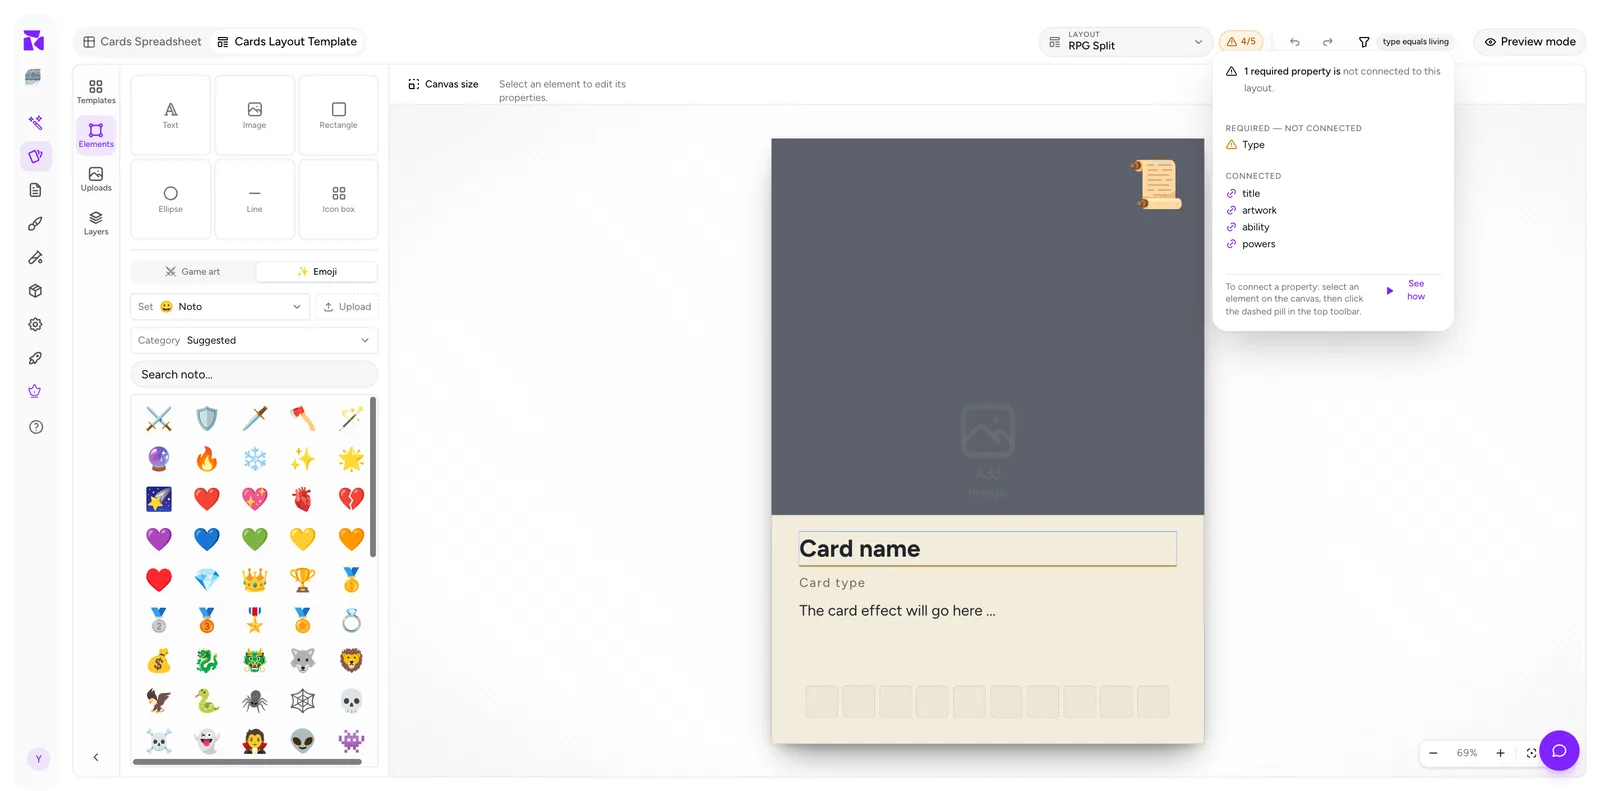
It splits into sections, most urgent first:
- REQUIRED: NOT CONNECTED: properties marked required that no element on this layout uses. Here:
Type. - OPTIONAL: NOT CONNECTED, when any exist.
- CONNECTED:
title,artwork,ability,powers.
And it repeats the fix:
To connect a property: select an element on the canvas, then click the dashed pill in the top toolbar.
If the popover reports a missing property, the layout is still holding a binding to a property that was renamed or deleted. Repair it by selecting the affected element, clearing the missing slot, and choosing the replacement property. Then preview a few cards; a connection counter at N/N confirms coverage, but only real card values confirm that the replacement has the right type and content.
The same warning in the spreadsheet
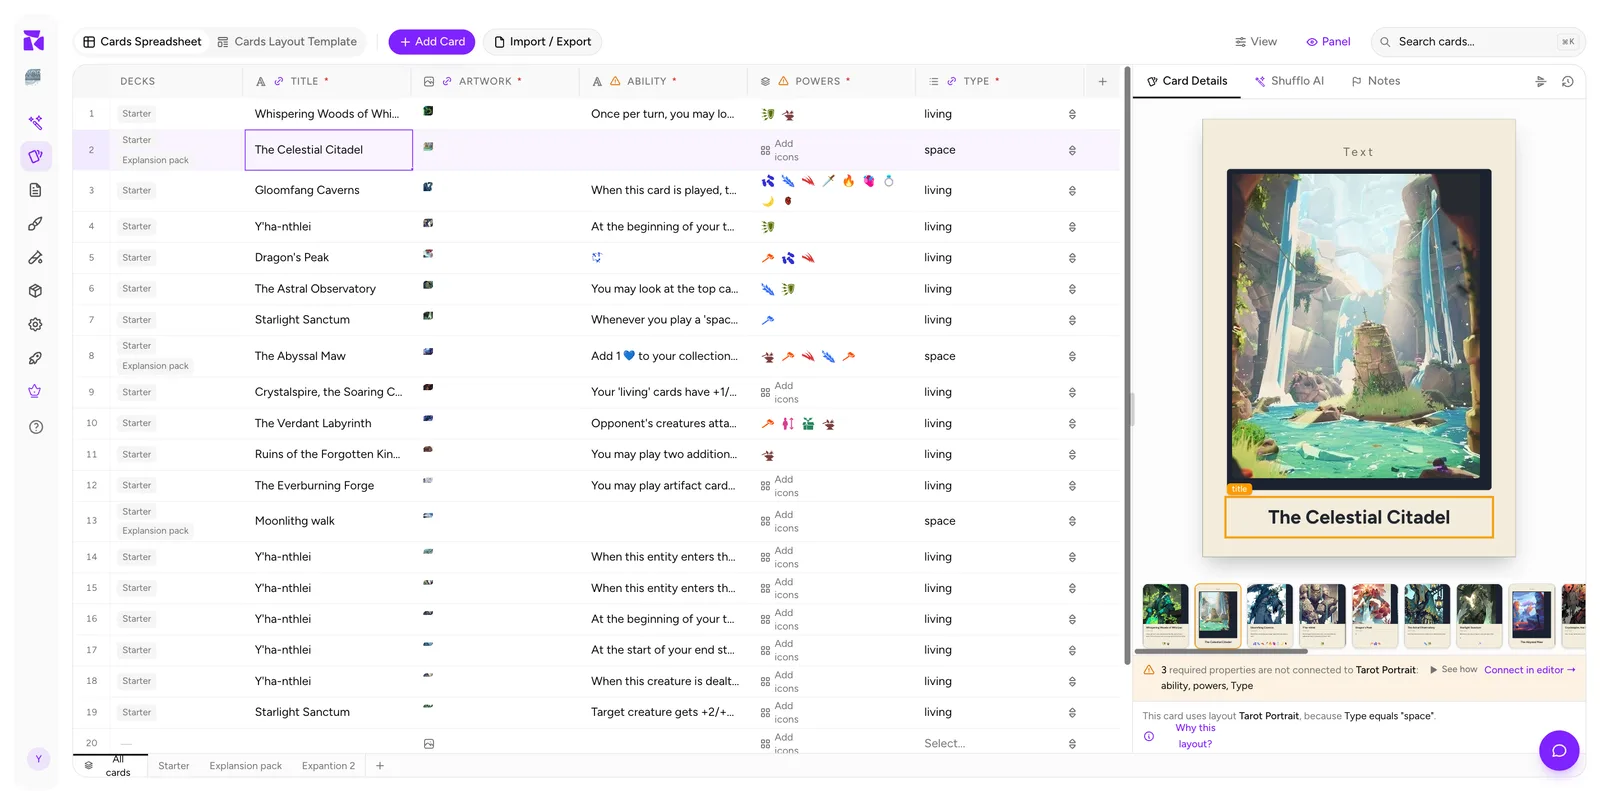
You don't have to be in the editor to see it. The Card Details panel shows it for the selected card:
⚠ 1 required property is not connected to RPG Split: Type
with See how and Connect in editor → actions. Connect in editor → jumps to the Layout Template tab with that layout loaded.
The count is per layout, so it changes as you click through cards. A space card using Tarot Portrait might report 3 required properties are not connected: ability, powers, Type while a living card on RPG Split reports only one.
Why the warning matters
A required property that isn't connected is data you're typing into the spreadsheet that will never appear on the printed card. That's the single most common "why is my card blank?" problem, and it's exactly what the counter is there to catch.
Two legitimate reasons to leave one unconnected:
- The property is used only in conditions:
Typedrives layout selection but doesn't need to be printed. - The property is internal: designer notes, a balance score.
In both cases the honest fix is to turn Required off for that property, so the warning stops crying wolf. Reserve Required for things that genuinely must reach the card.
Fallback content
With preview off, a bound element shows its static content, the design-time scaffolding text that lives on the layout itself. That's not something that ships. Turn on Preview mode to see real values, and step through several cards before signing off on a layout.
A working order
- Define your properties in the spreadsheet first, and mark the printed ones Required.
- Build or pick a layout.
- Add elements roughly where they belong.
- Connect each one, top to bottom in the Layers panel.
- Watch the counter reach
N/N. - Turn on Preview mode and page through every card.
- Repeat for each layout: connections are per layout, not shared.
That last point catches people out. Adding a new required property means revisiting every layout to connect it.











